Object Graph Explorer
Object Graph Explorer allows you to explore and analyze your object repository and associations visually. You can drop objects and their associations onto the diagram surface. Furthermore, you can customize how the elements look to simplify your research or analysis.
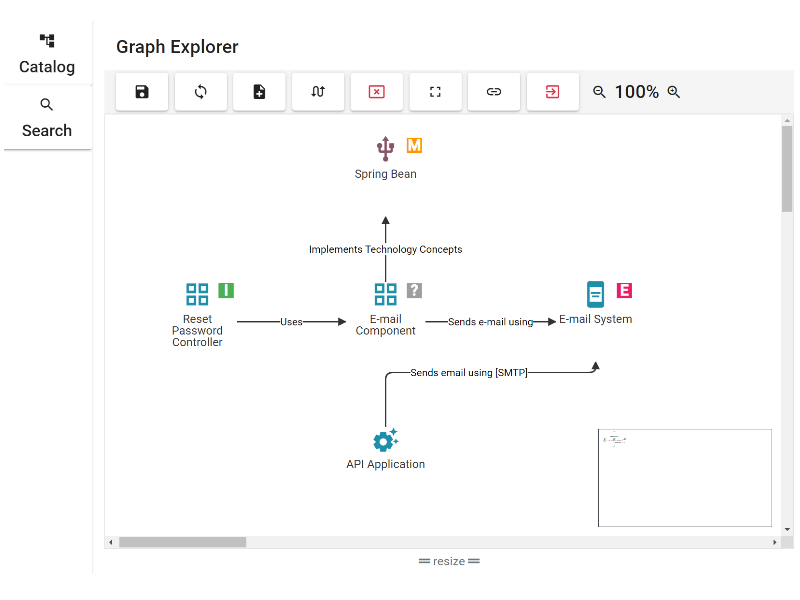
To access Object Graph explorer, click on any existing project name within the project list. Afterward, select the "Explore Graph" navigation link. This action will open Graph Explorer, consisting of an empty diagram area and a toolbar above it.
Graph Explorer Surface and Toolbar Items
The toolbar contains helpful functional buttons that help you work with the graph explorer.
- Save button (
 ) will store your current work as a diagram. If it is already a diagram, this action will overwrite the existing diagram with the currently visible content.
 - Refresh button (
 ) will detect and fix outdated object and association names on the diagram surface. This action is helpful if you renamed an object in the catalog designer after you added it to the graph explorer, in which case you would see the new name on the left and the old one in the graph explorer. Thus, you would want to refresh the view in the graph explorer. In another scenario, another user in your subscription may have changed the object's name, associations, or assessment category; the refresh button will fix the discrepancies on the screen. Note that it's unnecessary to refresh the diagram immediately after opening it since it's automatically validated as the model changes.
 - Object linking toggle (
 ), when active, allows linking objects by dragging one of them onto another. When trying to link objects, a dialog window opens to help you pick the right association kind between the two objects. In this dialog, you can specify a custom label that will display instead of the standard association name above the arrow between these objects.
 - Clear button (
 ) removes all objects and associations from the diagram surface. This action allows you to start your exploration or analysis from the beginning. When you remove objects from the diagram surface, they continue existing in the object catalog, which is convenient to reuse them for multiple exploration exercises.
 - Share button (
 ) opens a dialog where you can get a shareable link to the current diagram.
 - Download button (
 ) lets you export the current diagram as a PNG image.
 - Exit button (
 ) closes the currently open diagram and takes you to the list of diagrams under the project.
 - Zoom buttons (
 and
and
 ) change the display scale of the graph explorer's diagram surface.
 - You can pan the diagram's surface (i.e., move around the surface) by grabbing a blank area of the diagram and dragging it around. Alternatively, you can use the right-side and bottom scrollbars to achieve the same result.
Object Catalog Designer Toolbox of Graph Explorer
When you access the Graph Explorer, Object Catalog Designer displays on the left that works as a toolbox when combined with the Graph Explorer. The catalog interface must be familiar to you if you have tried to capture the objects and associations before. There are a couple of differences from the object manager page.
First, a toolbar above the catalog designer allows performing the following actions:
- Hide the object tree (
 ) when you don't need it. You can reopen it by clicking the catalog thumbnail button (
 ) at any time.
 - Refresh object catalog () if you have made changes to objects outside of the catalog designer.
- Switch to object finder (
 ) to locate an object by its name. This function is described below in the next section.
The other difference is the new button added next to the object names for adding the object to the diagram (![]() ). You can see this button next to the existing objects if you expand one of the object-type folders.
). You can see this button next to the existing objects if you expand one of the object-type folders.
To add a new object to the diagram surface, drag the object type folder from the catalog designer to the specific point where you want to drop the new object. A new object editor will open, where you can specify the object's name and confirm its creation.
There are two ways to add an existing object to the diagram surface:
- You can click on the button that we mentioned above (
 ). This action will add the object to the arbitrary location in the diagram. You can locate the object and change its position based on your needs.
 - You can drag an object and drop it onto the diagram's surface. This method is more convenient since you can place the object directly where you need it. Note that, due to the difference in screen gestures, and to avoid possible confusion, you can not use the drag-and-drop method on touch-screen-enabled devices.
In addition to dropping objects from the catalog designer onto the graph explorer's surface, you can also create and modify objects via the catalog designer as usual. This design decision comes in handy to simultaneously analyze the model and keep defining objects as you need them.
Object Finder Toolbox of Graph Explorer
Object finder lets you locate an object by its name. This window consists of a toolbar, search form, and the results pane.
Toolbar buttons allow you to perform the following actions:
- Hide the object finder (
 ) when you don't need it. You can reopen it by clicking the search thumbnail button () at any time.
 - Switch to catalog designer () to see all objects organized into folders.
Type a part or full object name into the search box and execute the search by clicking the corresponding button. All objects matching the provided text input will display under the form. You can add these objects to the diagram surface on the right side in two ways:
- You can click on the droplet icon (). This action will add the object to the arbitrary location in the diagram. You can locate the object and change its position based on your needs.
- You can drag an object and drop it onto the diagram's surface. This method is more convenient since you can place the object directly where you need it. Note that, due to the difference in screen gestures, and to avoid possible confusion, you can not use the drag-and-drop method on touch-screen-enabled devices.
Working with Objects in Graph Explorer
After you have dropped an object onto the graph explorer's surface, you can change its location by dragging it to where you want it to be. Select an object by clicking it for additional actions, displaying extra functional buttons under the object's name.
- Open object (
 ) to see its details, such as attributes, associations, and assessment. This action opens the object editor dialog, with which you are familiar from the catalog designer. Alternatively, double-click the object's visual box on the diagram to open the same dialog.
 - Toggle assessment (
 ) to show or hide a colorized assessment category tag next to the object on the diagram surface. Assessment categories follow Gartner's TIME model, and the tag will display the first letter of the category (T for Tolerate, I for Invest, M for Migrate, and E for Eliminate). If the assessment is missing, the tag will display a question mark.
 - Expand associations (
 ) to add all linked objects of the currently selected object onto the diagram's surface. This action is convenient to find all dependent or impacted objects from the current one. If any linked objects are not yet on the diagram, they will automatically show up together with their associations in the form of arrows. Another way of discovering dependencies is to add an object to the surface that already contains associated objects. The association will automatically draw on the diagram in such a case, indicating that you have found a dependent or an impacted object.
 - Remove an object from the diagram (
 ) if you don't want to see it in your current view. This action keeps the object in the catalog designer, and you can re-add it to the diagram at any time. If you intend to remove every object, you can use the Clear button as a shortcut located in the toolbar.
If you want to unselect the object and hide its action buttons, click on the blank area of the diagram or select another item.
Working with Associations in Graph Explorer
Associations connecting objects appear as arrows between those same elements. To see additional actions that you can perform on associations in graph explorer, select the corresponding arrow by clicking it. As a result, you will see functional buttons along the arrow.
- Change arrow annotation (
 ) to choose its shape and text variation. The arrow has two ends (i.e., arrowheads) and no text by default. By repeatedly clicking the annotation button, the arrow's shape goes through the following forms:
- Forward-looking with text.
- Backward-looking with text.
- Two-way with text.
- Forward-looking without text.
- Backward-looking without text.
- Two-way without text (the default starting point).
- Override arrow label (
 ) between the objects. You can also perform this action by double-clicking the arrow. A link editor dialog will appear where you specify the custom text. Note that the dialog's content depends on the arrow annotation state. Specifically, if the arrow is forward-looking, the dialog will allow editing the label from the source to the target object. Otherwise, for the backward-looking arrow, the dialog controls the label that goes in the opposite direction.
 - Switch between linear and rectangular arrow shapes (
 ) to organize the diagram's content and avoid overcrowding.
 - Remove the association arrow from the diagram (
 ). This action does not remove the association between the objects from the catalog designer. To display the removed association again, enable object linking from the toolbar, drag one object onto another, and pick the existing link in the dialog.
 - Remove the association from the model (
 ). This action will remove the association from the catalog designer. It is a convenient shortcut to unlink the objects permanently without opening the object editor dialog. You can re-link the objects via the object editor or by dragging the objects onto each other, assuming the linking is enabled in the toolbar.
 - See all actions relevant to the association (
 ). You can also perform this action by right-clicking the arrow.
See Also